If you have never picked up a crochet hook, you’ve come to the right place. The internet in general has lots of resources that can help you learn to crochet. And the chain stitch is the foundation stitch for ALL crochet. This step by step photo tutorial will walk you through the chain stitch.
This might be the most frustrating part of your learning journey, but please don’t despair if you experiencing difficulty. Frustration goes hand in hand with learning (just think of your little one struggling with times tables, or writing a paragraph.) Learning a new skill takes time, so you might spend more time than you think you ought learning some of the basics. But, if you invest that time, you will have at your fingertips the ability to move from someone who knows little to nothing when it comes to crochet, to an expert. Yes, this is possible. So please stay with me, remind yourself that “hey, maybe I can’t do this yet, but I am learning from each mistake and I am capable of learning to crochet.” A little growth mindset goes a long way!
Let’s begin with the slip knot.
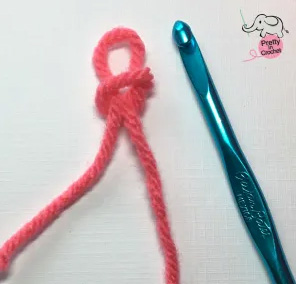
- To create a slip knot, simply create a loop with the tail end of your yarn (see Figure 1) and then insert your crochet hook through the center of the loop (Figure 2). Pull up and through. The loop on your hook should be nice and firm but loose enough so that you can work with the yarn (see Figure 3). You have created a slip knot, and mastered one of today’s beginner basics!
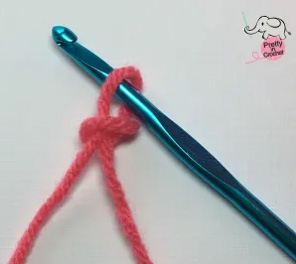
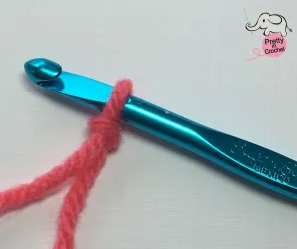
Give yourself a pat on the back, it took me years to master this. I had my own little trick prior to learning this 😉
- Now, moving onto the chain stitch (which will read as ch in patterns), the foundation of crochet. Every crochet project you create relies on this stitch. So this is key to crochet. Now that you have your slip knot on your hook, take your yarn and bring it the back of your hook (this is a yarn over) and pull it through the loop on your hook. That is your first chain stitch. Do it again, bring the yarn over the crochet hook from back to front and hook it and draw through the loop on your hook. That’s your second chain stitch. Repeat, repeat, repeat for practice.
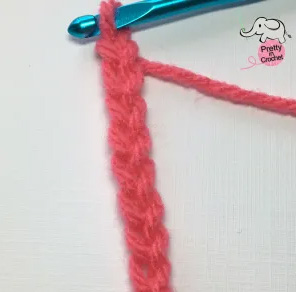
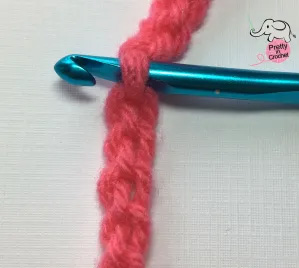
Your chain stitches should look like little V’s if you are doing this correctly (see Figure 4). The back of the chain should have a lovely little bump or ridge (see Figure 5; I’ve inserted my hook through a ridge–also called the back bump–to help you locate it). Remember not to pull too tightly or you won’t be able to insert your hook into these chain stitches later. But don’t chain too loosely either! As long as you have a nice chain of V’s similar to mine you’re doing fine.
A Note About Tension
Everyone’s tension is different. Some people crochet more tightly, some more loosely. This won’t really affect the look of your project too much as long as your stitches are being worked correctly. At the beginning, your tension may go from loose to tight and your swatch or project may look uneven. That’s perfectly fine–remember it’s a learning piece. Your tension will become more consistent as you become more comfortable with the hook, and techniques.
A Note About Hooks
There is a lot of discussion out there about the best type of crochet hook. And a wide variety to choose from. When I was young, I started with some ancient plastic hook that someone had given to my grandmother who gave it to my aunt who gave it to me. Was it a good hook? I’ve no idea. It got me taught though, so I’m sure any hook will do for the basics.
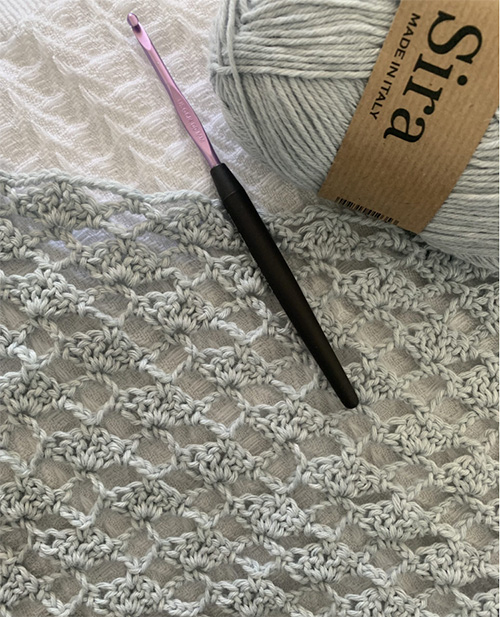
However, I have found that many crocheters believe that some hooks are superior to others. I cannot say I’ve found much difference in my own use of different brands, (unless a hook is poorly made and can’t really do its job well) as to the overall look of the project, although there are some hook brands I prefer over others. A good, reasonably priced set of hooks by Susan Bates is what I bought when I started seriously crocheting again, and they have served me well. I still use them all the time, though I’ve also grown quite fond of Clover hooks, which many experienced crocheters recommend. I avoid Boye hooks personally, I had a few of their hooks and for some reason always found my yarn splitting or ended up making errors. I’ve no idea how, but their hooks have proved an exercise in frustration for me. However, they are a reputable brand and well loved by makers. Over the years, I’ve learned there is no best brand, but good brands and that which hook is best is really up to your preference.
Subscribe to the newsletter to stay in the loop!
